Thursday, October 18, 2012

Block {FOUR} of the Mystery!

this is the FINAL block!
are you soooo excited?!


ok. so here's the scoop.
i have no clue how to attach a pdf or any such thing to this, so...
you'll have to make your own template.
i have complete confidence in you ;)

click on the picture below and save the image to your computer.
i have given you the measurements, so it shouldn't be too hard.
i would recommend making the template from freezer paper. it will help keep it in place.


ok. so now that you have your template, let's get started...

Using {6} dark and {4} light 1 3/4" strips, make {TWO} more DLDLD sections
like the picture below.


Now, trim the ends of each strip (as little as possible) and fold them in half.
position your freezer paper template on the strip like i've shown below.
(yes, it fits just barely and one of the points is cut off)
(in the picture, i used a left over piece of one of the strips, yours will be much longer)


cut, flip the template and continue cutting
cut until you have {8} left and {8} right triangles.

this will happen automatically, so don't worry!

i will see you back here tomorrow for the lay-out
and the GRAND REVEAL!!!

Posted by Picasa

Wednesday, October 17, 2012

Block {THREE} of the Mystery!

i know that you are all dying to get this done, so here's block {three}
you will need to make {8} blocks that look like this.


start by sewing together one dark and light strip
like this...


then sub-cut the above pieced strip into {eight} 1 3/4" units.
following the diagram below, piece together the {eight} half-log cabin blocks.


as a side note...
i didn't like the method above ( my blocks got a little wonky) so i cut the following and pieced the blocks together with the individual cut pieces rather than long strips as shown.

From the light strips, cut...
{8} 3" units, {8} 4 1/4" units, {8} 5 1/2" units

From the dark strips, cut...
{8} 3" units, {8} 4 1/4" units, {8} 5 1/2" units and {8} 6 3/4" units


So, for example, once you have your {8} 1 3/4" units pieced and cut, cut and sew a 3" x 1 3/4" light unit to it (as shown in the above diagram). Then cut and sew a 3" dark piece to it, then a 4 1/4" dark piece to that, and so on...
it takes a bit more work, but the end result is a truer block. it should measure 6 3/4" square.

hope this make sense. holler if you have a question.

Posted by Picasa

Tuesday, October 16, 2012

Block {TWO} of the Mystery!


(one of each section is shown.  you need TWO of the LDLDL)


Using these sections and the leftovers from Block One, 
cut the sections into 1 3/4" pieces like the picture.
You will need {48} LDLDL sections & 32 DLDLD sections
(If you trim too much off the ends you won't be able to get all that you need)


Lay the strips out like the picture below
making sure that you have a light in each of the four corners.


Piece the block together.
Make 16 blocks (the squares should measure 6 3/4")


See you tomorrow for Block {THREE}


Monday, October 15, 2012

Block {ONE} of the Mystery!


Block {One}

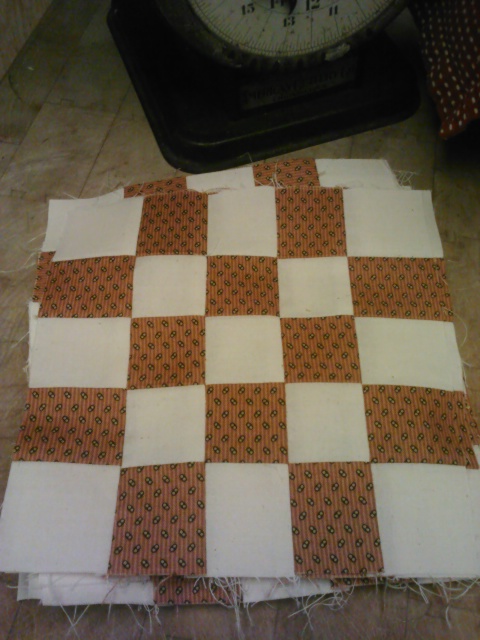
Using 6 of the 13/4” light strips, and 9 of the 1 3/4" dark strips, 
sew 3 sections of DLDLD,


 and cut them into 6 3/4" squares until you have 16 units like the picture.


Save the leftovers for {Block Two}


see you tomorrow for block {TWO}

Sunday, October 14, 2012

The Mystery's {CUT}


friday has come and gone, but
i hope you all got your fabric because here are the cutting instructions!


Cutting Instructions:

From Dark Fabric, cut…
{32} strips 1 3/4" x wof (42-45”)

From Light Fabric, cut…
{22} strips 1 3/4" x wof
{6} strips 5” x wof

{1} 7  3/4" x  wo f strip
sub-cut this strip into…
{2} 7  3/4" squares – cut these once on the diagonal
{1} 7  3/4" square and cut this one TWICE on the diagonal
(set all the above triangles aside)

Also from the light, cut…
{4} 6 3/4" x wof strips
Stack these strips and cut them into {21} 6 3/4" squares
Set them aside…


i will see you back here tomorrow for block {ONE}

Wednesday, October 10, 2012

It's a {MYSTERY}

quilt!
do you wanna make it with us???


if you do, go get yourself
3 yards of a light fabric
& 2 yards of a dark fabric

the quilt will measure 64" square.

i will give you a couple days to gather your fabric.
meet me back here on friday for the cutting instructions!

Posted by Picasa

September's Midnight Madness

with october's class right around the corner,
i thought i should probably show you september's fun!


{the goods...}

krusteaz pumpkin bar {found at walmart} was a HUGE hit
topped with a yummy frosting made from
8 oz cool whip
1/2 cup nonfat milk
& one small box of pumpkin pie pudding mix
(or butterscotch)
enjoy!

{the gals...that i LOVE}

and {the quilts...}

Posted by Picasa

Tuesday, October 09, 2012

Adela's Christmas Quilt

once in a while,
a quilt will come into my life that i ABSOLUTELY {love}!!!


this is definetly one of those quilts!
after i quilted it, i did not want to give it back!!!
the pattern is from
kathy campbell of heart to heart
you can get the pattern here


i am simply in love with this quilt.
and super jealous of adela's needlework skills!

Posted by Picasa

Monday, October 08, 2012

i LOVE little surprises!!!

and i know you do too!


i thought i'd share this cute gift that i recieved from someone special.
if you want to make one for someone special to you,
you can find the book {words with wool} here

Posted by Picasa

Saturday, October 06, 2012

Pumpkin Lollipops

STOP it! how stinkin' cute are these!!!

 
sweet sugarbelle has the complete tutorial to make these!
absolutely love it!

Posted by Picasa

Friday, October 05, 2012

September's Monday's Best Class

we made this quilt by cheri.
it was originally published for cheri by indigo junction and is currently unavailable.


i made these delicious and SIMPLE caramel apple cupcakes


that i originally found here but i simplified it a bit.


you'll need one betty crocker spice cake mix (not duncan hines)
frost them with pre-made caramel dip found in the produce section
and dip them in chopped pecans.
i scrubbed and washed sticks to make them look a bit more like a caramel apple but you could use craft sticks or popsicle sticks.

for the treat bags
 
 i bought a book from the dollar store
(the bigger the better and make sure you double check the content)
tear out 2 pages per bag, stitch them along 3 sides, scallop the top
and fill them with halloween garland and candy.
add a halloween tag and you are good to go.
i found the cat download at graphics fairy
enjoy!!!

Posted by Picasa

Thursday, October 04, 2012

Sometimes...

life gets in the way...


and weeks go by that seem to have no end and then all of a sudden you can see a shimmer of light and you are grateful that there is indeed a light at the end of the tunnel.

i have a lot of catching up to do on this neglected ol' blog. so hang in there and i'll try to catch you up on some quilting and fun. 

and in case you didn't know, halloween is a close second to christmas around here and i can't wait to share some easy peasy fall recipes, halloween decorations, and treats.

lots of love to all of you and thank you for stopping by!
love,
julie