Showing posts with label tutorial. Show all posts

Friday, April 23, 2010

You had me at the neosporin!

i found a link that took me to this wonderful blog called fireflies and jellybeans {cute!} and low and behold this is what i saw!!!
some of my closer friends know that i have a thing about neosporin.
it's kinda like WD-40 for some or Duct tape for others!
so when i saw this i knew it was for me and i thought i'd share it with you.
it's a must make for the car!
LOVE it!

Thursday, April 22, 2010

i need to make a sewing machine cover.
i've been searching the web for some ideas. aren't these cute...

i found this picture here. i love the fabric choices!

and this one was cute i like the idea of the applique


of course martha always has great ideas. this one is from an old magazine, but i think i want the whole thing covered.

this is definetly a favorite! i LOVE pam garrison's work. click here for a free download of the embroidery pattern.

in the end, i decided that i would follow this tutorial and go with a simple cover like these...


Posted by Picasa

Thursday, February 26, 2009

Serving Others

is so much easier when you have a plan.
i have two meals that i make when i get the opportunity to bring a dinner to a family.

(i'd like to add that i take the easiest route when putting these together and often times that means ready made crust and frozen veggies...)

the first is a chicken pot pie, salad and banana bread.


chicken pot pie


1 pkg. of pillsbury pie crust
2-3 cups chicken breast (cooked and diced)
16 oz. cooked mixed veggies
1/3 cup butter
1 1/3 cup chicken broth
1/3 cup chopped onion
2/3 cup milk
1/3 cup flour
1/2 tsp. salt
1/4 tsp. pepper


melt butter & add onions until they are tender. add flour, salt, pepper, broth and milk and cook over med heat until thick. remove from heat and add chicken and veggies. spread crust in pie plate and add mixture. cover with top crust and flute edges (cut away excess dough) with excess dough roll and cut out a cute shape with cookie cutter. cover edges of pie crust with foil and bake at 425 for 35 min.


my notes: i always double this and make two. i only use pillsbury pie crusts, the others are yuck! i only use the bags of frozen skinless, boneless chicken breast tenders. (don't ask) i haven't always been too thrilled with my fluting and you might feel the same way. don't worry no one notices!


the banana bread recipe is so yummy!!!
i actually got it from here!

i'm SuPeR excited because presentation is ReAllY impotant to me and i found a great way to dress up the bread! penny from sew take a hike has an amazing blog full of great ideas and tutorials like this one. so nice!


and if it's a new baby your visiting, she has a great tutorial to make a changing pad.

ok, so that's the first...

the second meal is just as easy. it's an enchilada casserole, spanish rice and a 'sante fe' salad.

enchilada casserole

16 oz. sour cream
16 oz. jar of salsa
1 can (10.75) cream of chicken soup
1/4 cup diced onion
6 (12") flour tortillas, cut into strips
6 boneless, skinless chicken breats cooked and shredded
4 cups shredded cheddar cheese

mix sour cream, salsa, cream of chicken soup and onion. layer the bottom of a 9 x 13 baking dish with 1/3 of the tortilla strips, 1/3 of the chicken, 1/3 of the mixture and 1/3 of the cheese. repeat layering with remaining ingredients. bake at 350 for 20-30 min. or until bubbly. enjoy!!!

i make spanish rice to serve with it. i got a great recipe here!
the salad is a pack called 'sante fe' salad.
it's pretty darn good.

and for a yummy treat make this canned corn casserole.

corn casserole

15 oz can drained whole kernel corn
15 oz. can creamed corn
1 box jiffy corn bread mix
1/2 cup sugar
2 eggs, well beaten
1 stick of margarine, melted
8 oz sour cream

mix all ingredients together in a bowl. pour into a well greased 9 x 13 baking dish. bake at 350 for 45 min. or until center is firm.

well that's it. i hope you weren't disappointed.

Why


am i just now finding this!!!

they have a ton of tutorials like this braided rug.
that is made using my all time favorite fabric!!!
and this super easy but way too cute table runner
(mom you need this!)


and this quilt

and oh so much more!!!


(ps. the pictures are from moda's site...get over there!)

Saturday, February 07, 2009

Scalloped Borders

i told a friend that i would scallop her border for her.
it really makes a big difference.
anyways, since i was doing it, i thought i'd make up a tutorial for it.
(please keep in mind that i've NEVER done a tutorial and i am lacking sleep.)

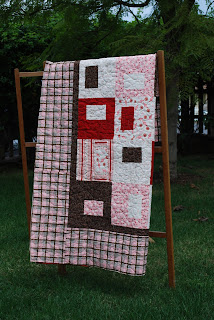
i always start with a trimmed quilt.
and i always start with the top and bottom of the quilt.
so fold your quilt in half and measure.
this quilt measured 52 x 60.
now you need to make (or find) a template. usually, a scallop for this size quilt is anywhere between 7 - 9 inches in diameter. divide your quilt measurements by numbers within that range until you are able to get close to a whole number.
for example: i found that 52 % 8.5 was pretty close to 6 and 60 % 8.5 was really close to 7.
which will give me 6 scallops on Align Centerthe top & bottom and 7 scallops on the sides.
next you need to make a template. if you have a compass you can easily make your circle...
if not you can use my ancient method.
using your ruler, draw a vertical line (in my case, 8 1/2 inches) mark your center point.
lining up your ruler with the vertical line and keeping it centered, draw a horizontal line.
continue drawing lines until you feel comfortable free handing a circle. cut out your circle, and wah-la you have your template!

starting with the folded side, place your the center of your template along the fold and trace the pattern. next, place your template on the opposite corner and trace.

continue to trace your pattern until you have a continous scalloped pattern.

in my case, i will end up with 6 scallops like i calculated in the beginning.
keeping the quilt folded, cut along the scalloped line.
this will now become your pattern for the bottom border. fold the quilt in half and cut along the pre-cut edge.

yeah! th top and bottom borders are done. now repeat the above steps to scallop the side borders.
now the binding! just a couple tips. i make my binding from 1 1/2 inch bias strips and i start my binding on one of the four corners.
when you get to the corner, be careful to get that fold of fabric out of the way.
i stop right about here (see picture above). lift up presser foot and turn quilt.
i usually use my awl to keep the fabric away from the needle. (i couldn't find it today)
with my right hand, i pull the fabric back and away, lower my pressure foot and continue.
when your all done, you'll have a beautiful quilt!
i hope this made sense and your able to use it.


Posted by Picasa

Wednesday, February 04, 2009

A Truly Fabulous Find


and i think you will all agree!!!
i found this amazing and talented woman kellie
while traveling through blogland.
she's from australia and has a few quilt patterns that she is selling on her website.
really it is beautiful and i'm going to order the garden party pattern.
the pillow above is a tutorial, yes, a tutorial!!!
go here for the pattern and how to. beautiful!!!
if you visit her, be sure to leave a comment and let her know i sent you.
have a happy day!


Machine Applique

just got easier, thanks to anne over at bunnyhill designs.
she has a great tutorial and several tips
to make your applique look like a pro's!
i can't wait to try her technique!

Monday, February 02, 2009

I've Created a Monster...

yes, i admit it...it's all my fault. (kinda)
today the little princess and i went to wal-mart to get valentine goodies for 3 different parties. i actually went in to get the martha stewart heart embellishments for a project that i'm doing and a box of valentine cards for the little princesses kindergarten party. i ended up with all this stuff and a dress with a matching bow that is being worn in as i write. as promised, i am not making homemade valentine cards for the kindergarten class, so off we went in search of valentines (which, obtw, is not with all the other valentine stuff, it's way back in the garden area...go figure)

anyway, the little princess first thought she was going to buy cards for each friend and i explained to her that, that is not how it works. we buy a pack and everyone gets the same kind.

with that i got this..."mom, the boys don't like girl stuff." i again, explained that girls buy girl cards and boys buy boy cards and no one minds. well apparently she does...

her exact words..."it has to be perfect"

(oh my, what have i done!!!)

this is what we ended up with...boy cards for the boys and girl cards for the girls.

Posted by Picasa